Do you ever find yourself scrambling to shorten your reins? Does your horse throw his head up as a result? Do you pitch forward when you shorten the reins? Or maybe the only way you know how to shorten them is what I call the ‘creepy crawly’ method. Here is a three-step process to shortening your reins quickly, efficiently and without pulling on your horse’s mouth.
At times we all need to be able to shorten our reins to communicate to our horse. Whether you ride Western or English, with a halter and rope reins, English reins or even split reins you want to be able to shorten the reins without disturbing your horse. There are a number of circumstances where shortening your reins is necessary. For instance, you might be riding on a loose rein going down the trail and suddenly your horse stumbles or starts at a deer. At these moments it is important to have practiced shortening your reins so that you automatically recover your reins and quickly steady yourself and horse.
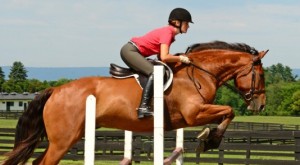
When riding a dressage test the transition from a long rein to contact should be smooth. If you tip forward, pull back on the reins, or tense your shoulders when shortening your reins you might cause horse to lose balance, jig or toss his head in the air. When jumping, the ability to shorten your reins quickly is a must. You may have to give your reins away over one fence but then you need to be able to quickly shorten them in order to recover before the next obstacle. Therefore, having good technique for shortening your reins is important in all forms of riding.
The three steps to efficiently and quickly shortening your reins are:
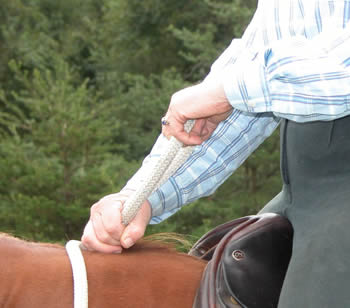
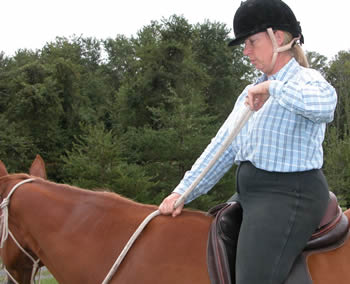
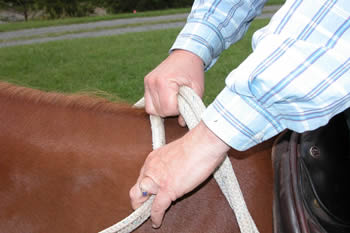
1. Take the bight (the loop or end of the rein) in one hand while firmly grasping both reins in the other. Make sure to press your fist holding the two reins against the horse’s neck. This prevents you from pulling on the horse’s mouth.
2. Draw back on the bight. How much you draw the bight will determine how short you make the reins. Therefore the action of shortening the reins comes from your shoulder and elbow, not your hand. The hand moves diagonally away from the fist pushing into the horse’s neck, not towards your body. If the bight hand were to move towards your body you would restrict the movement and limit how much you could shorten the reins. You must make sure the fist hand on the horse’s neck remains firmly pressed into the horse in order to keep the contact steady and even.
3. Drop the bight and separate the reins into two hands. If you drew the bight with your right hand you would take the right rein. If you drew the bight with your left hand you would take the left rein. Keep pushing on the horse’s neck until you have separated the reins into two hands. Note: When riding with a Western curb bit you would not necessarily separate the reins in two hands. In this case you would simply release the hand that is pressing into the horse’s neck and resume holding the reins in one hand.
Practice this three-step method off the horse first. Then practice on your horse standing still and finally in motion. When practicing it is not important how much you shorten the reins, simply that you go through the steps to improve your technique. While practicing only draw the slack out of the rein rather than actually connecting to the horse’s mouth or head. By practicing you will develop a new habit to replace the old one. When you actually need to shorten your reins your practicing will pay off. Also remember to switch hands so that you can shorten your reins equally well right or left-handed.
Use this Murdoch Minute as a ‘body position self-check’ to make sure you stay balanced and upright when shortening the reins. Practice this exercise until you can do it quickly and easily without fumbling, that way you will automatically use this technique when you most need it. And remember – enjoy the ride!


